Hawkesbury and tiller pilot
-
Andrew

- Posts: 542
- Joined: Sun Aug 18, 2013 11:33 am
- Investigator Boat Name: Teria
- Location: Townsville, Qld
- Contact:
Re: Hawkesbury and tiller pilot
Thanks for that info Geoff and Ian, sounds like it will be well worth it.
From what i've gathered the TP10 and ST1000+ are similar. One note is that ST1000's don't have a "full lock stall" auto-cut out as TP10's have. so correct fuse size needed and don't let it go full lock,
http://parkerseal.org.uk/forum/g/posts/ ... -raymarine see post #4
Teria still has remnant holes from a long gone tiller pilot. The socket and plug hole is on the cockpit wall about 30cm above the floor aft near transom.
Andrew
Investigator #9 Teria
Investigator #9 Teria
-
Geoff

- Posts: 295
- Joined: Tue Oct 29, 2019 12:04 pm
- Investigator Boat Name: #50 Timeless
- Location: Monto, Queensland
Re: Hawkesbury and tiller pilot
Andrew,
Thanks heaps for the info and the link. I know I've had mine hit end of travel and start to chatter. I'll be a lot more careful from now on.
I will also read the manual and check the fuse fitted. Rather blow a fuse than burn the guts out of the thing.
Thanks again.
Thanks heaps for the info and the link. I know I've had mine hit end of travel and start to chatter. I'll be a lot more careful from now on.
I will also read the manual and check the fuse fitted. Rather blow a fuse than burn the guts out of the thing.
Thanks again.
Geoff
Investigator #50 'Timeless'
Investigator #111 'Missy'
As the engineer said, "sure it works in practice, but will it work in theory?"
Investigator #50 'Timeless'
Investigator #111 'Missy'
As the engineer said, "sure it works in practice, but will it work in theory?"
-
Peter T

- Posts: 645
- Joined: Sat Aug 15, 2020 10:34 pm
- Investigator Boat Name: Sail- La- Vie
- Location: Ulverstone Tasmania
Re: Hawkesbury and tiller pilot
Hi Chaps, also with the fitting of the Tiller pilots, it is critical when fitting them that you use the EXACT measurements given in the instructions from the pivot point of the rudder to the mounting point for the tiller pilot. If this is incorrect, it will cause either trying to force the thing further than its range or it will not give enough movement to push the tiller far enough. Also, for the same reason, it's also critical that the length of any extension fitted to the push rod is correct to have it hold the rudder in the straight ahead position without having too much offset set in to the settings. If these two things are correct, it will minimise hunting and blowing fuses due to having it trying to over extend.
Hope this helps.
Cheers
Hope this helps.
Cheers
Regards Peter T
" Sail-La-Vie," # 114
"Believe me, my young friend, there is nothing - absolutely nothing - half so much worth doing as simply messing about in boats."
" Sail-La-Vie," # 114
"Believe me, my young friend, there is nothing - absolutely nothing - half so much worth doing as simply messing about in boats."
-
Andrew
- Posts: 542
- Joined: Sun Aug 18, 2013 11:33 am
- Investigator Boat Name: Teria
- Location: Townsville, Qld
- Contact:
Re: Hawkesbury and tiller pilot
Glad it helped Geoff, and also thanks Peter , i suspected that was the case, so now will go the extra bit and move my coaming bush back aft about 5cm (glue extra wood block inside coaming for brass bush).
The ST1000 is good for upto a 3000kg displacement sailboat, so we are only at about 1/3 that weight. There would be plenty of reserve power in the pilot.
After install there's a further setup procedure, like compass spinning and calibration, etc in manual. and making sure the mid ram point is when rudder is centered.
Balancing the sails/rig so there is minimal (weather) helm important too. and Raymarine doesn't recommend its use on a dead run in seas, broad reach at 30deg off downwind. (uncontrolled Gybes bad, ) switch back to hand steering when outside its operating limits.
Andrew
Investigator #9 Teria
Investigator #9 Teria
-
Peter T
- Posts: 645
- Joined: Sat Aug 15, 2020 10:34 pm
- Investigator Boat Name: Sail- La- Vie
- Location: Ulverstone Tasmania
Re: Hawkesbury and tiller pilot
Hi Andrew, I downloaded the manual for the ST1000, you can do the same.see below the set up which I think is page 33 or 34.
That distance of 18 inches from the rudder pivot point , you should use the pintle of the rudder to measure from, however, both pintles on the stern are not in a vertical plane ( stern is angled)
So it may be best to pick the centre between both pintles to measure from. If you can, might pay to make something up temporary that is adjustable to be able to find the perfect spot to permanently fit the mounting hole.
As you say, it has plenty of ability for our size boats.
The set up in the picture is quite important . Also, from it, you could work out the exact length of extension rod that would be required, especially if you mount it on the top of the combing.
The bottom of the photo shows to measure at 90 deg from the stern angle which in our case is opposite to what's shown
If mounting on the combing, measure from mounting point to centre of straight tiller, then take the 589 mm off that and that will give you the length of extension you will need
Hope this helps. Cheers
Regards Peter T
" Sail-La-Vie," # 114
"Believe me, my young friend, there is nothing - absolutely nothing - half so much worth doing as simply messing about in boats."
" Sail-La-Vie," # 114
"Believe me, my young friend, there is nothing - absolutely nothing - half so much worth doing as simply messing about in boats."
Re: Hawkesbury and tiller pilot
Hi Andrew,
"glue extra wood block inside coaming for brass bush"
I found that the GRP laminate at the top of the coaming was about 1/2" thick (or more) so I just drilled and press-fit the bronze socket fitting with some polyurethane to seal. Not sure if this is best practice but it's pretty solid.
Ian
"glue extra wood block inside coaming for brass bush"
I found that the GRP laminate at the top of the coaming was about 1/2" thick (or more) so I just drilled and press-fit the bronze socket fitting with some polyurethane to seal. Not sure if this is best practice but it's pretty solid.
Ian
Ian, Rhythm #121
-
Peter T
- Posts: 645
- Joined: Sat Aug 15, 2020 10:34 pm
- Investigator Boat Name: Sail- La- Vie
- Location: Ulverstone Tasmania
Re: Hawkesbury and tiller pilot
Hi Andrew, that will do mate but best practice would be to dril it out bigger, then tape it up from underneath and fill it with epoxy and then when set, drill the right size hole back in to the epoxy and then seal it. That way it's not possible for any water to ever get into the fibres of the glass.
On saying that, it's probably OK like you have done it though as there is no wood core in that part of the boat.
Cheers
On saying that, it's probably OK like you have done it though as there is no wood core in that part of the boat.
Cheers
Regards Peter T
" Sail-La-Vie," # 114
"Believe me, my young friend, there is nothing - absolutely nothing - half so much worth doing as simply messing about in boats."
" Sail-La-Vie," # 114
"Believe me, my young friend, there is nothing - absolutely nothing - half so much worth doing as simply messing about in boats."
-
Andrew
- Posts: 542
- Joined: Sun Aug 18, 2013 11:33 am
- Investigator Boat Name: Teria
- Location: Townsville, Qld
- Contact:
Re: Hawkesbury and tiller pilot
I've epoxied another wood block underneath the coaming, and its also glued it to the previous wood blocks aft end, hope that hold it ok. Reckon most of the side-force will be in the coamings fiberglass shell (the tiller pilot can push/pull upto 57 kgs) So drilling the bushing hole has to be a very precice fit (Raymarine is USA, measurements all imperial , feet and inches NOT metric) so there is no "rattle room" in the fibreglass shell.
Only yesterday visited Raymarines website (In retrospect, something i suggest anyone does FIRST before buying any type of marine electronics). I went there to register my TP unit for free extended 3yr waranty but general public can also browse there, search box to find product. They also had where the certified Raymarine electronics repair/install shops are located. Discovered there are two here in Townsville, tucked away from the boating masses) They have trained technicians, could be good for those who prefer to go for a proffesional installation)
Only yesterday visited Raymarines website (In retrospect, something i suggest anyone does FIRST before buying any type of marine electronics). I went there to register my TP unit for free extended 3yr waranty but general public can also browse there, search box to find product. They also had where the certified Raymarine electronics repair/install shops are located. Discovered there are two here in Townsville, tucked away from the boating masses) They have trained technicians, could be good for those who prefer to go for a proffesional installation)
Andrew
Investigator #9 Teria
Investigator #9 Teria
-
Andrew
- Posts: 542
- Joined: Sun Aug 18, 2013 11:33 am
- Investigator Boat Name: Teria
- Location: Townsville, Qld
- Contact:
Re: Hawkesbury and tiller pilot
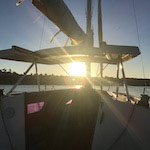
Gday, finally got the Tillerpilot setup and test sailed to Magnetic Island. Here's a blog update on it https://teria563.blogspot.com/2023/11/t ... ystem.html
Andrew
Investigator #9 Teria
Investigator #9 Teria